How to Replace Trailer Brakes
Mar 12, 2020Last Updated on September 30, 2024 by Matthew Sholly
Last Updated on September 30, 2024 by allprotrailersuperstore
Properly functioning trailer brakes should never be an afterthought. Every trailer owner should grow familiar with the process of checking and installing new braking systems — both for the integrity of your rig and the safety of others on the road.
Follow the steps to learn the basics on how to remove and replace your trailer’s brakes, plus warning signs it’s time to get those trailer brake replacements in the first place.
Table of Contents
- When Should You Replace Trailer Brakes?
- What Do You Need to Replace Trailer Brakes?
- How to Replace Trailer Brakes
- Perform a Brake Controller Inspection
- Expose the Inner Brake Drum
- Inspect the Brake Drum Assembly
- Remove the Brake Drum’s Inner Wheel Bearing and Seal Components
- Clean the Removed Drum and Axle Spindle
- Replace the Inner Brake Assembly
- Add New Wheel Bearings and Races, If Needed
- Reinstall the New Outer Brake Bearing Components
- Return the Tire
- Test Actuation
- When to Have Trailer Brakes Replaced Professionally
- Find a Trailer Brake Inspection and Service Provider Near You
When Should You Replace Trailer Brakes?
There is no single, definitive point where you must install new brakes in your trailer.
Instead, mechanics and brake manufacturers alike suggest keeping track of certain variables to help inform the general condition of your brakes. These variables, such as your trailer’s weight, towing frequency, distances traveled, towing terrain and even driving style will all affect trailer brake replacement schedules.
However, there are a few milestones to consider when maintaining the quality and integrity of your trailer’s brakes — as well as recommendations straight from your brake’s manual — and ensuring the safety of your tow.
1. At 200 Miles for Manually Adjusted Brakes
It’s recommended that brand new, fresh-out-the-dealership trailers see their brakes inspected and adjusted near the 200-mile mark.
Around 200 miles is the time when brake shoes and drums, two central components of the brake’s inner assembly, will have “seated.” Properly seated shoes and drums interact with your braking system’s electromagnet and core brake controller. Together, these pieces ultimately trigger the friction that stops your trailer every time you press down on the brake in the driver’s seat.
Without properly seated shoes and drums, the braking process will be slow, inefficient or — worst-case scenario — even dangerous.
After a 200-mile brake inspection, trailer brakes can generally be reviewed roughly once a year, during annual licensing inspections or as much as your trailer towing frequency requires.
2. At 12,000 Miles
In addition to annual brake system inspections, wheel bearings should be lubricated roughly every 12,000 miles. For regularly towed heavy-duty travel trailers and fifth-wheel RVs that see many miles on the road, those schedules could be more often.
Note, though, that greasing or “packing” bearings is not the same as replacing bearings. However, the two are similar processes in that accessing the inner and outer bearings will require comparable steps to all-out installing new brakes.
3. When Your Manual Recommends
Check the brake recommendations stated in your trailer owner’s manual or produced by your axle manufacturer. That manual should also explain the generalized, step-by-step instructions for how to install and replace your model’s specific brake components, adjust shoe seating and properly pack your bearings.
4. When Brake Performance Generally Suffers
Apply common sense when it comes to maintaining and replacing your trailer brakes. If you notice noisy wheel bearings, odd brake lags or differences in braking pressures, it’s time to inspect components. If adjusting brake shoes still doesn’t cut it, you could be due for a system replacement.
What Do You Need to Replace Trailer Brakes?
Replacing trailer brake systems will require a handful of tools to conduct the installation safely and efficiently. Ensure you own or have access to the following before removing any trailer wheel parts.
1. Proper Tools
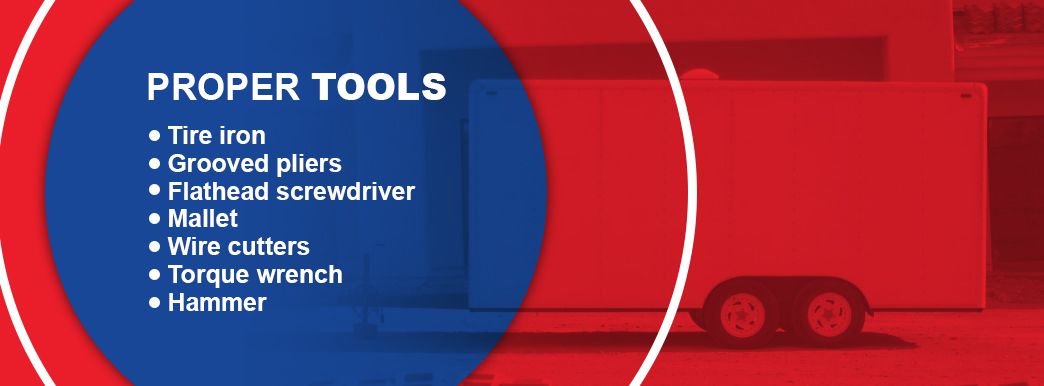
These basic mechanical tools will make up the toolkit when replacing trailer brakes:
- Tire iron: To safely remove trailer wheels.
- Grooved pliers: Ideal for gripping a trailer brake system’s disparately sized parts.
- Flathead screwdriver: For a variety of necessary plying and screwing steps.
- Mallet: For the quickest, most functional way to remove the initial grease and dust trap.
- Wire cutters: Essential to cut and remove your brake’s old magnet wires and crimp its new ones.
- Torque wrench: To tighten the trailer’s wheel and various brake pieces into place, following manual limits.
- Hammer: Making sure various smaller seals and washers you’ll be installing sit flush around edges.
2. General Equipment
In addition to the tools above, make sure to have the following items on hand:
- Hydraulic car jack: To prop the vehicle up, then support the trailer while it’s mounted off-ground.
- Work gloves: Work gloves are especially important if you’re packing grease into your own replacement bearings, a process explained more in-depth below.
- Appropriate grease lubricant: Ideally a type approved by the axle manufacturer, to pack inner and outer brake bearings.
How to Replace Trailer Brakes
Interested in the process of replacing your trailer brakes? Professional mechanics follow these step-by-step instructions to assure a smooth, safe and, hopefully, head-ache-free electric trailer brake installation.
1. Perform a Brake Controller Inspection
Before getting your hands dirty, you must first inspect the mechanical heart of the entire trailer’s braking system — the brake controller.
Brake controllers connect and communicate with your brake drum’s magnet. Most drivers will place their controllers near or beneath their dashboards, making it easy to access and check when braking issues arise.
To run an initial brake controller inspection, review the following:
- Wire conditions: Controller wires should look smooth and intact, without visible fraying, bumps, tears or scoring
- Schematic included: Make sure your brake controller still contains its schematic — that is, its general wiring diagram signaling how to wire the trailer according to its specs properly.
- Proper power readings and outputs: Controllers should be sending appropriate outputs to your trailer brakes, which you can check using a voltmeter or similar device.
2. Expose the Inner Brake Drum
Brake drum deconstruction begins by removing the outer dust or grease cap, then removing a handful of components around the central spindle or axle.
- Remove the dust/grease cap: Use large grooved pliers, a screwdriver or — when caps are older and worn — a mallet to pop off the cap. If using a mallet, apply forcible but controlled outward-facing hits while spinning the drum to loosen it gradually.
- Pry off the nut retainer: Next, use a large flathead screwdriver to push off the nut retainer and then the securing cotter pin, if there is one.
- Spin off the spindle nut: Use your hands to remove the retaining spindle nut from the central axle.
- Remove the outer bearing: At this point, the outer wheel bearing should slip off relatively smoothly. It’s generally recommended to discard outer bearings, as these components tend to get rusty with age.
3. Inspect the Brake Drum Assembly
With your brake drum interior assembly exposed, you can now inspect its interior assembly components, including the magnet. Check the overall brake drum assembly for:
- Cracks, scores or loose springs across the drum assembly’s surface
- Proper drum thickness, not worn down away from suggested spec sizes
Mechanics will then turn their attention to the assembly’s central magnet, which is what receives outputs from the controller to engage the trailer brakes. They’ll check to see if the magnet:
- Wiggles around a bit when pushed. This is good — you don’t want stiff or congealed magnets.
- Contains four surface dots. Trailer brake magnets should contain four dots on its face-side surface. When a magnet wears down, these dots disappear.
This is also a great point to check your star wheel. Star wheels are a small adjustment spring located at the bottom of your magnet. Like the magnet itself, it should also wiggle when pressed but shouldn’t feel loose.
4. Remove the Brake Drum’s Inner Wheel Bearing and Seal Components
First, use wire cutters to snip your magnet’s wires just behind the drum’s backplate. This can be a daunting step, often one best left to professionals.
- Important note: Perform this step only when reinstalling an entirely new brake assembly kit. Otherwise, you’ll permanently cut off your magnet-controller connection.
Begin unscrewing the nuts and washers holding the interior brake assembly to its central axle. You may also have to unscrew the wheel bearing seal, which many manufacturers mark with arrows. Once unscrewed, the rest of the drum assembly should slide right off, leaving you with a naked axle.
5. Clean the Removed Drum and Axle Spindle
Use appropriate solvents to spray and clean your axle, removing any dirt, grime or residual lubricant that’s accumulated. Do the same with your interior brake drum you’ve just removed.
This is also a great time to clean and grease your unit’s zerk filling, dumping out any residual grease and refilling it with fresh lubricant. Inspect the bearing races you exposed in Steps 2 and 4. If any are scarred or chipped, find replacements immediately. Finally, add a light layer of fresh lubricant back onto your spindle.
6. Replace the Inner Brake Assembly
Your new inner drum assembly likely comes in a kit containing all the components and pieces you’ll need for the new drum. These kits tend to include but aren’t limited to any of the following:
- Left- and right-side shoes
- Fresh bolts, usually around 3/8-inch
- Magnet unit
- Inner bearings, sometimes pre-grease packed, other times not
Once removed from its packaging, carefully place the new inner brake assembly on the freshly lubricated spindle. Take care you position the assembly’s right and left shoes in their appropriate sides. You may also now coil-crimp your assembly magnet’s two wires back where you cut the old ones, just behind the drum plate. Trailer brake magnets are not polarized, so the positive and negative sides can be interchanged here.
Keep in mind the following situations that often strike while replacing an inner brake drum assembly:
- The drum won’t fit over the left and right shoe: Expand the shoes by turning the tension adjuster, or star wheel, located at the base of the brake assembly’s magnet. The drum should eventually slide between the two tabs.
- Overall shoe tension isn’t right: There should be a tiny gap left between the drum and the left and right shoes. Too much or too little room left between these components, and you’ll have a hard time applying enough pressure to your trailer brakes. While drums and shoes actually do self-adjust for proper pressurization over time, they must start off on a semi-appropriate spatial ratio to ensure you’re driving a stoppable vehicle.
7. Add New Wheel Bearings and Races, If Needed
Grease your inner bearings before applying them back into the outer brake drum hub, which should also be lubricated. However, do note that greasing bearings is a dirty job. These ridged pieces need to be “packed” with grease, either by using a professional bearing packer tool or by placing a blob in your palm and packing it the old-fashioned way.
Don’t be stingy when grease packing. You want each bearing to be slicked, even slightly oozing, with lubricant, able to slide easily back into the drum hub and onto the axle. Double-check you’re using only high-temperature wheel bearing grease as well.
8. Reinstall the New Outer Brake Bearing Components
At this point, you’re ready to attach the outer brake bearings and assembly components back over the cleaned and lubricated axle. This will connect it with your inner brake assembly components, including your newly wired magnet.
After positioning the drum hub, you can begin reinstalling the other outer drum and bearing components you removed in Step 2, now in reverse order. That means reinstalling first the hub with its packed grease bearings, then the wider drum, then the outer wheel bearing, the bearing washers, the retaining spindle nut, the cotter pin and — last but not least — the grease cap.
If your grease cap is worn or damaged and no longer seats squarely over a hub, find a replacement. Grease caps are generally inexpensive but it’s critical they seal tightly.
9. Return the Tire
With all of your new trailer brake pieces in place, you may now reinstall your trailer’s tires. Use a torque wrench or similar tool to torque the lug nuts back to their designated factory specs.
10. Test Actuation
Last but not least, grab your brake controller to run a final actuation test. This test checks to see if the electric side of your trailer brake system has been configured correctly, namely the crimping system wires back in Step 6.
Maximum voltage outputs during your actuation will vary depending on your trailer type and brake kit. However, if the voltmeter or similar testing device doesn’t register a maximum voltage output in less than five seconds, or if readings don’t match manufacturer schematics, there may be a lingering problem with the trailer brake. Wiring problems like these are rare when all installation steps and details have been performed by a professional.
When to Have Trailer Brakes Replaced Professionally
Having a professional mechanic inspect or install your electronic trailer brakes can be a relief. For many people, the technicality and gravity of properly replacing trailer brakes is too big a task to take on themselves.
Always err on the side of caution when it comes to working on your trailer, including tackling even “minor” brake concerns. If any of the following situations apply to you, consider scheduling a trailer brake inspection or repair.
1. You’re Unsure About Drum Conditions
Brake drums are reusable. Yet as one of the central components of the entire braking system, you may find yourself wanting a second opinion on the true nature of its condition.
Local auto shops can inspect your drums beyond surface rust. Some even have special machines which can put drums through a rejuvenation process called turning, which is more cost-conscious than buying new drum kits altogether.
2. You Want a Second Opinion on Shoe-Drum Tension
Properly seating shoes is essential to creating and maintaining good levels of friction for braking. It can also take a little finesse, particularly to find that initial balance between drum-shoe gaps and wiggle room before they self-adjust over time.
Professional mechanics can set that Goldilocks-level amount of tension within your new brake system. This may alleviate any worry your brakes aren’t seated properly or aren’t self-adjusting at healthy rates.
3. You Just Want the Expert’s Touch
There are nearly a dozen pieces of equipment that go into installing a brand new trailer brake kit. What’s more, installing trailer brakes almost always involves electrical actuation tests and precise wire cutting in addition to the physical mechanics, adding another daunting layer of work.
Having a professional install your trailer brakes ensures it’s done quickly and done well. That pledge is powerful, putting your mind at ease while you haul thousands of pounds down the open road.
Find a Trailer Brake Inspection and Service Provider Near You
Reach out to the trailer experts at All Pro Trailer Superstore with any questions you have regarding your trailer’s electric brake systems. No concern is too small — and no reason justifies leaving the safety of your brakes to chance.


